
The kickboards on the bridgedeck are 140mm high (50mm may be hidden under a false floor), and on a boat with limited space that is a lot of shelf space to lose. And the black box processor of the 8000i screen is quite big, so I have decided that a great place to mount it would be under the bottom shelf in the space created by the kickboard. It is out of the way yet still accessible if I make the bottom shelf removable and being directly below where I will be mounting the screen it all works well. In fact there will be a couple of other black boxes, one for the broadband radar and one for the broadband sounder unit there is plenty of room n there for all of them, out of the way so they dont use up valuable shelf space above. And whilst I probably should not be broadcasting it on a public forum, it also hides all of the units out of sight, which should deter thieves from breaking into the boat to try to steal it all. I am working on the principle that thieves dont generally break in to see what you might have, and thieves generally dont read build blogs.
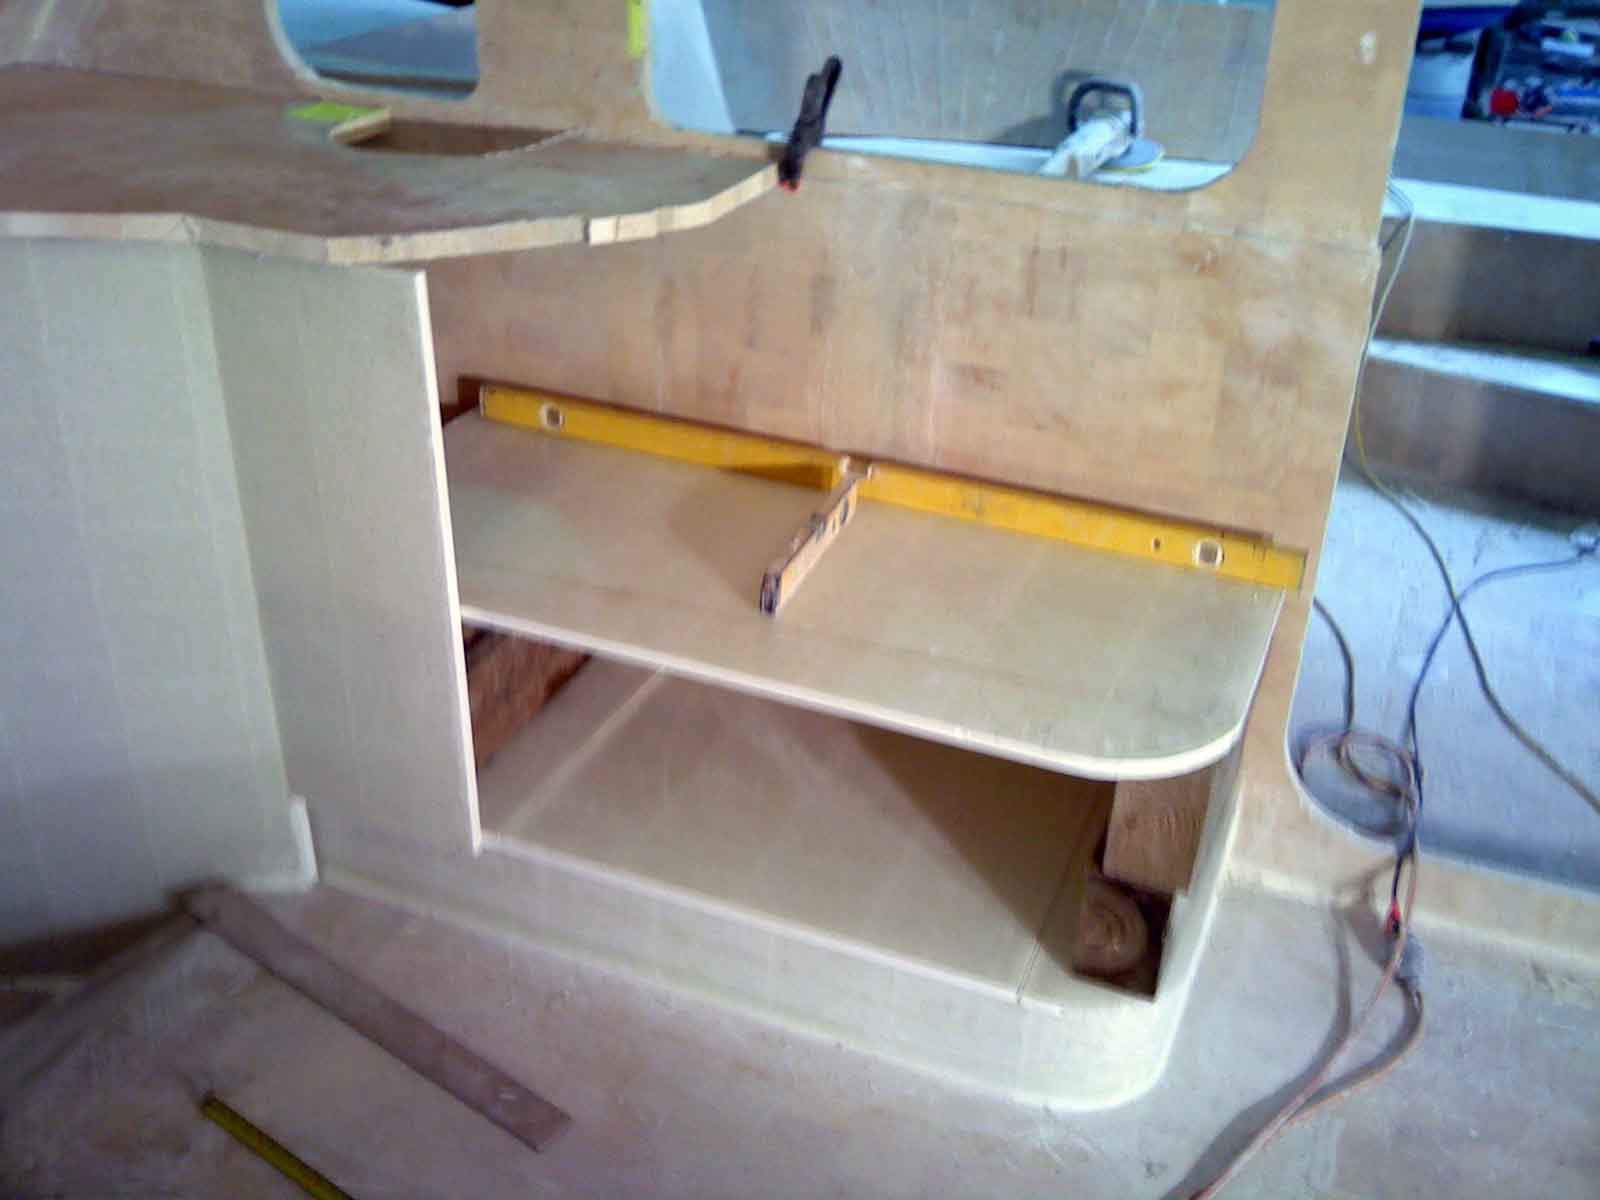
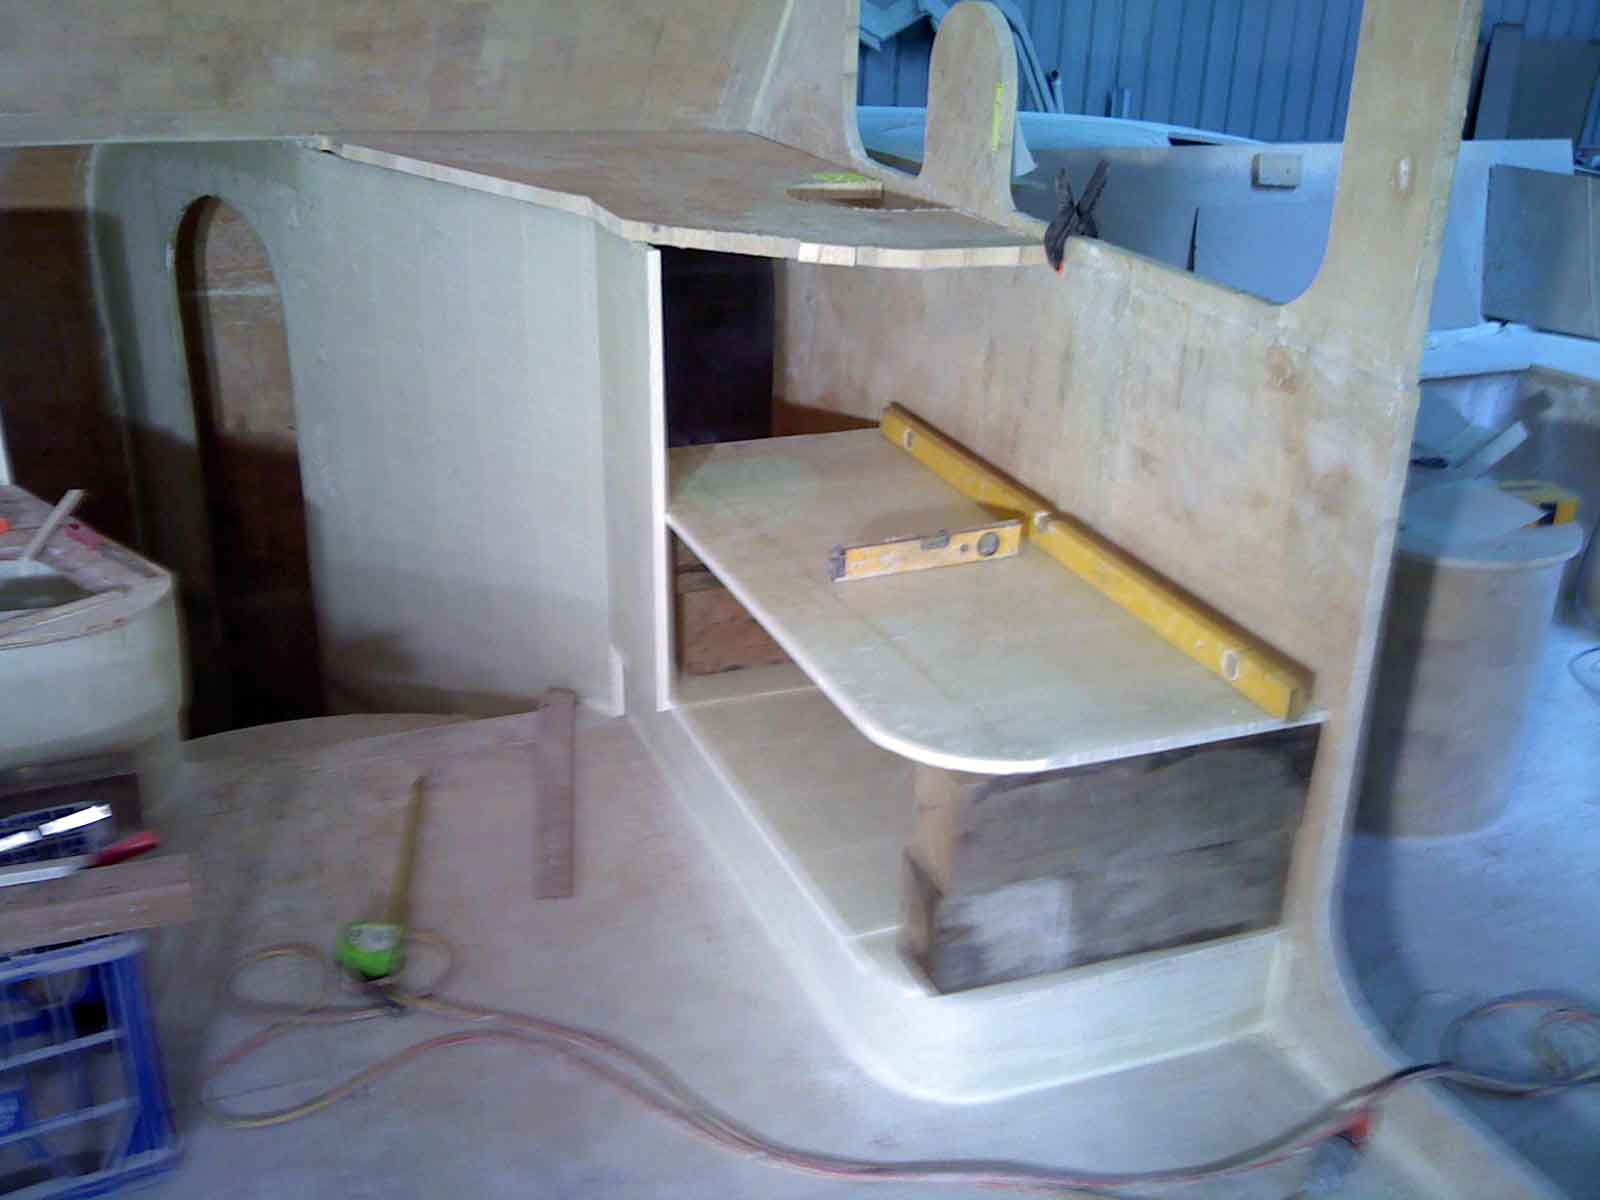
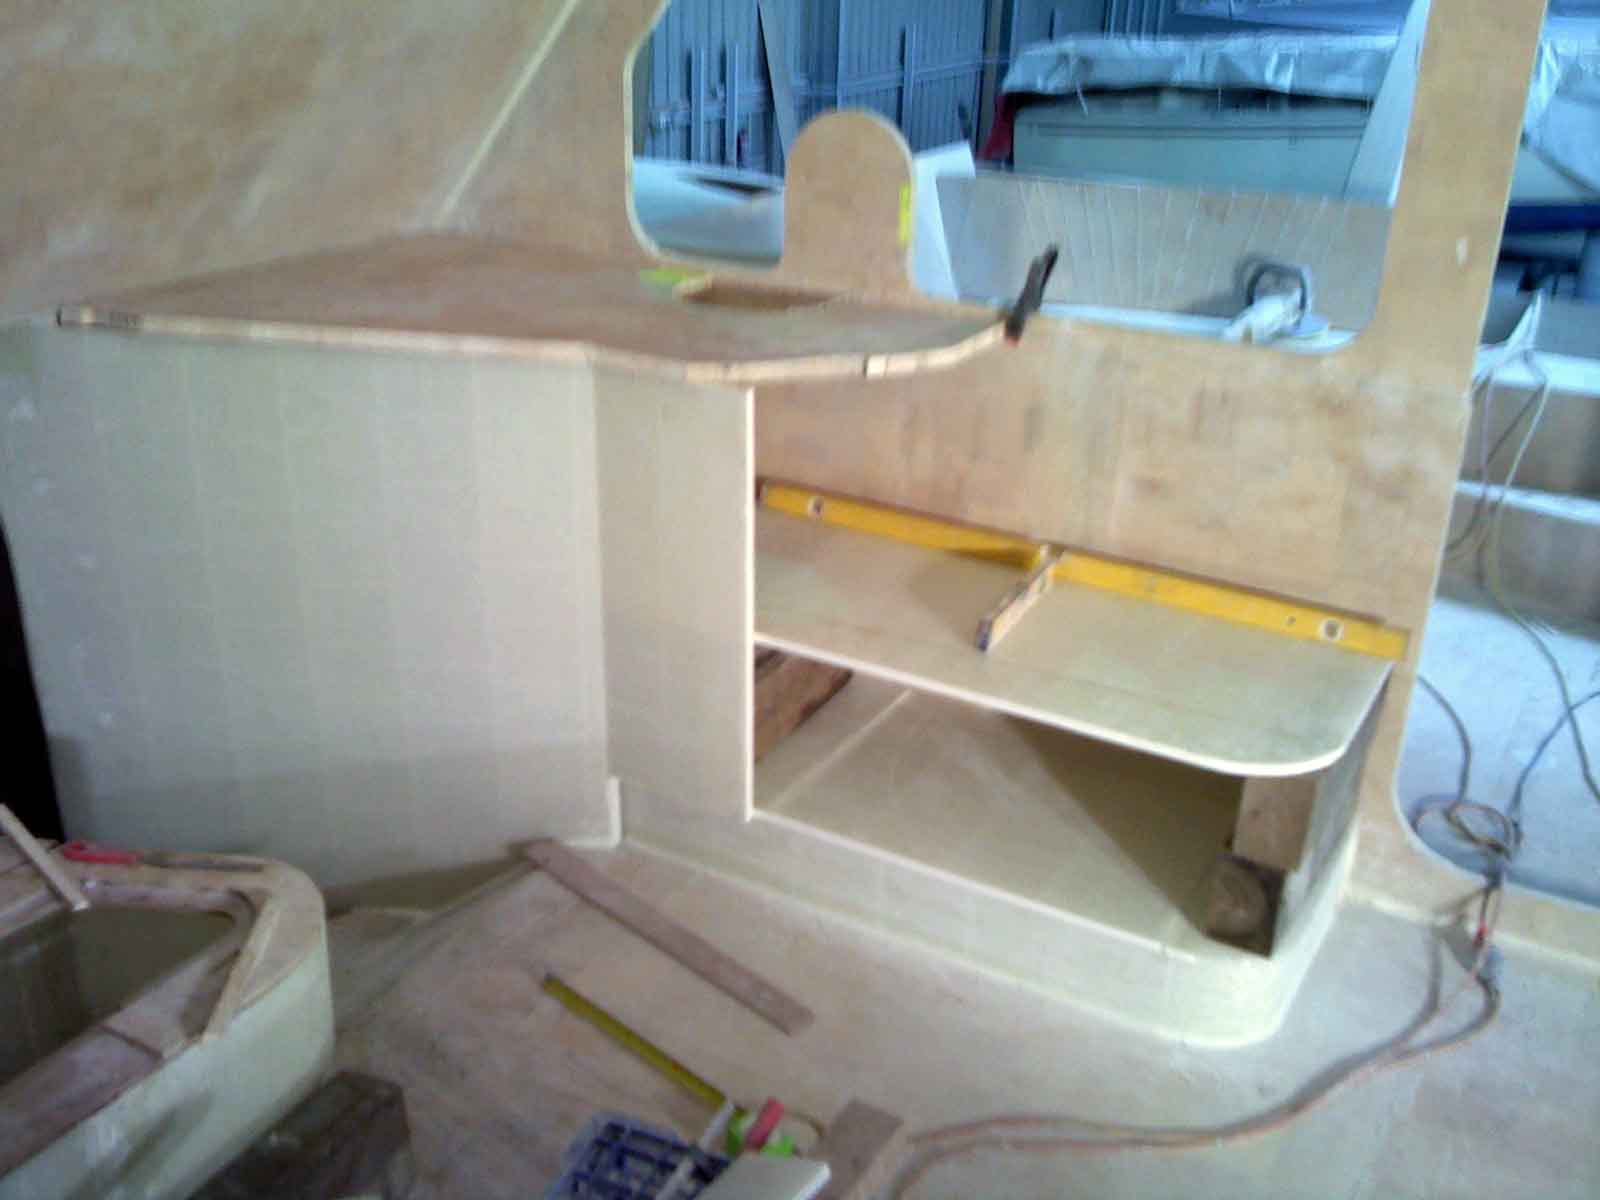
In order to have a removable shelf, I had to cut it yesterday, decore the edges and back fill them, which fortunately I did. So today I was ready to glass the 2 parts of the bottom shelf either side of the removable middle section, which today I did. And having a removable middle section meant I was able to reach in under the 2 parts of the shelves being glassed in and glass the underside to the bulkhead and kickboard. Reaching in and under to cove upside down is not that easy in a confined space but is doable as is getting glass to stick upside down.
Then glassing the tops of the bottom shelf halves was easy. As was setting the spacers up to hold the middle shelf in place while I glassed it in. This was a little harder work as I had a much longer cove to apply and a longer tape along the bulkhead to get to stay stuck upside down, but again with some resin on the underside of the shelf and bulkhead to tack off a little before rolling the tape on did the trick.
I also got the 25mm duflex offcut from the window cut-out and started to make the top from it. It will need another part glued and glassed together to form the entire top but I plan to have a hinged section at the doorway end of the top, which will form a lid that opens up to house the plotter screen when not in use. Its a big screen and is somewhat obtrusive when not being used, so housing it under the bench top when at anchor will serve 2 purposes, besides storing it out of sight and out of the way, it also hides it from view to again stop thieves from being tempted to break in to steal it if we are away from the boat for any extended time. I hope I dont sound too paranoid. An once of prevention and all that. The anti theft is a bonus and not the primary motivation.
Once the nav cabinet shelves were in and setting I had enough time to get started on the bathroom wall template. I use a template to transcribe the exact shape to the polycore sheets so that I dont have any mishaps cutting the panel to the correct size and shape. It actually saves a lot of time. I am actually going to move the wall about 100mm forward from my initial position. I will need to cut that 100mm from each of the steps already glassed in, but this is no big problem, I trimmed the steps on the starboard hull to get the wall in at exactly the right angle. And the steps into the port hull are already a bit wider (by about 120mm) than the steps in the starboard hull, which is part of the reason I am moving the wall. I initially thought the space was better used having a wider stairwell but now that the stairs are in the starboard hull with walls and cabinet either side, I can tell I dont need the steps wider and have changed my mind and decided I would rather have a bigger bathroom. Its not so much the space in the room but the space on the chamfer panel after the wall goes on, between it and the bulkhead. I want to fit the vanity unit on it and still have space for the escape hatch so the wider it is the better. It is currently 1100mm but I will add another 100mm to make it 1200mm which splits nicely to 600mm for the vanity and 600mm for the escape hatch. That should just be enough.


Tomorrow I might get another couple of hours done gluing and glassing the 2 sections of 25mm polycore together to make a panel big enough to cut the bulkhead from. As I did last time, I will need to decide if I have the join going horizontal or vertical, last time I chose horizontal and will probably go the same way this time. The bulkhead wont be as wide as the starboard one, because this bulkhead will be square to the centreline not on an angle, but I dont think this will persuade me that joining it vertically will be better, as with the starboard hull, a lot of the joins will be hidden inside the cupboards either side of the doorway leaving only a small section each side visible that will need fairing. If I do get a couple of hours tomorrow, it will mean I have managed 62 hours on the build this month, which isn’t too bad considering I was away for the boat show for 8 days.


