
As you can see from the dates on the 2 posts, I am not updating the site as frequently as usual. Unfortunately I have been having computer issues and as a result I am working from my old laptop which is a bit slow and clunky but more importantly besides uploading it I also keep a back up copy of the entire site on my computer and because I am now working on an older computer I was trying to avoid having different versions on different drives. Anyway, I am still making the updates albeit less frequently for a while and getting work done, even though it is still not enough work.
I have continued with building the lounge furniture concentrating first on the starboard hull end so that the cabinet that is formed below the starboard end of the settee is completed also which would then just leave the finishing of the aft bunk room to finish that section of furniture and then the starboard main bunk bed set up and the furniture for the starboard side of the boat would be pretty much done (I still have the glass the ensuite vanity in and final fit the toilet so still a lot of work to go really).
The space under the seating at the starboard end of the settee will be split between some on bridgedeck under seat storage and the cupboard space in the starboard hull. In order to separate the 2 sections off, the next task was to fit a dividing panel into the framework. Then shelves could be set into the space accessible from the starboard hull.
All of the width dimensions already having been set by the spacing of the upright framework walls, leaving only height of and spacing of shelf considerations. One of the shelf heights needs no consideration, so that there is consistency, there is a shelf at bench top height as part of the shelf will form a bench top and this height is traditionally 900mm from the floor but in the boat it is 880mm from the floor and an 80mm kickboard height.


Notice with the 90 degree cubic framework above I had chosen to make the fore/aft panel one piece and cut the upright panel, the only reason I did this was to maximize efficient cutting from a sheet. I had considered using the slotted cross (cross halving joint) where you cut a slot for each panel half way from the top of one cross and half way from the bottom of the other, its a bit stronger but at the end I considered the slight added strength not worth the sacrifice in extra material.
Next panel I glassed in was the starboard end seat back, this went in before the stairwell end upright panel because the anchoring points to set the seat back correctly were there in the bulkhead and the middle upright but the only guide or anchor point for the stairwell end panel was the steps, so I felt it better to have another point to anchor it whilst the glue and glass set. This panel is not the original rectangle originally planned but a rectangle with a rectangle cut out of the top right hand (aft) corner). Because I am building the furniture out over the chamfer panel and to side deck height there is no space for a gap between the furniture and the saloon walls as is common in bridgedeck cats. The reason for the gap is to let light and air through the hulls and it gives the hulls a more open feel. Jo quite likes that feature and wanted me to try to incorporate it. I did not want to sacrifice seat back height so the 2 features are in conflict. The solution was half and half. Half way along the seat at the point of the middle upright panel I cut away the height of the seat back (and also the depth of the cupboard below but that wont become apparent until the next step) in order to give Jo some of the feature she wanted and I think the outcome of our collaborative compromise is better than the outcome either of us would have had if we went completely one way or the other. The best of both worlds is more than the sum of its parts! As well as the more light and air in the hull feature there is also a shelf or arm rest behind the seat and makes a feature of the area.
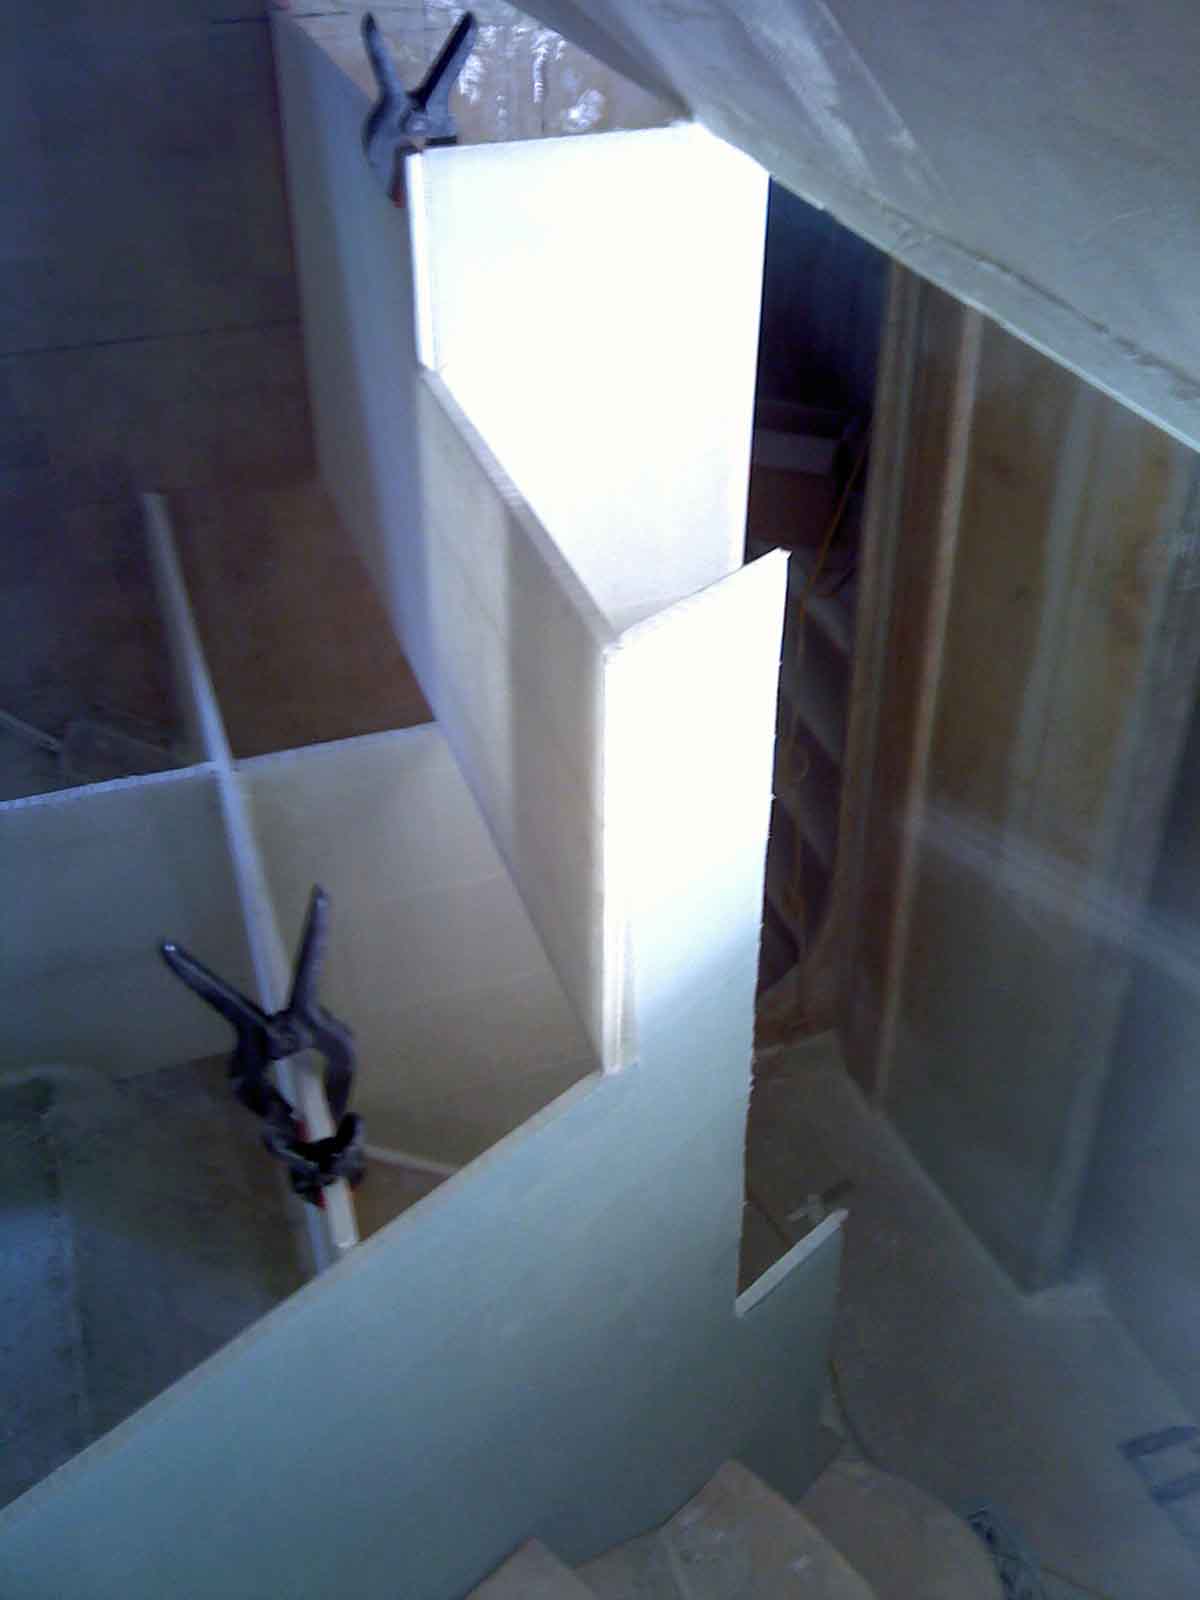


In the pictures above the seat end is just sitting in place, it is not yet glassed in. I still had to angle the front edges back to square to the centreline so that the cupboard door that will eventually be hung on the front of that cabinet all line up, and then the ubiquitous decore and back fill. Also note the seat back edge overhangs slightly. This is deliberate so again I could back fill and then round the corner once the end panel was glassed in. The set back of the top half of the end section of the cupboard as mention in the previous paragraph is to help with the feel of opening up that corner of the stair well. There will be a bench top that continues behind the set back door.


The stairwell end panel is glassed onto the hull and stair risers and to the seat back and frame inside the under seat that separates it from the cupboard. Next step to finish the hull side of the cupboard is to fit the top and the shelves and base (kickboard) so that all that is left to do is hang doors (the same state the other cupboards are in) although I may still put drawers and the angled pot draws in to make best use of the chamfer panel, other wise the bottom 500mm of space is virtually useless as the shelf below it is only 150mm deep).


I then have to start working my way around to the other end of the sofa by putting the kickboard and front panel on. I have made a mold for making the curved sections and started with an unglassed strip of poly to see if that was the best way to achieve the curves I need. The first attempt could safely be called an abject failure. The lessons from this are that you cannot form the curve with both sides wet out together, it has to be one side at a time, and perhaps this mold can only do curves one way, that is outside of the curve on the outside of the furniture, inside of the curve outside will need to be done with another mirroring mold. The action of pulling the shape to the mold and clamping it down (trying to avoid screws) creates creases in the glass against the mold. Or if all else fails I will have to kerf and fair.


Then once the port end of the framing done and the front is on all the way around I can make the tops which will include access hatches to each section below.


