
I have had both knees operated on during the time I have been building but for now at least I dont need hip replacements. But the boat has hips that will need to be faired out. More on that later in this post.
After cutting out the engine doors from the rear steps last week, next task is to stiffen all of the edges up and attaching plates to the underside to hold the lids in place with the weight of at least 2 people on them when the lids are down and act as steps, which is what they will be 90% of the time. I doubt its possible for more than 2 people to be on the door/steps at the same time, they are not as big as they used to be, but I want a margin of safety built in.
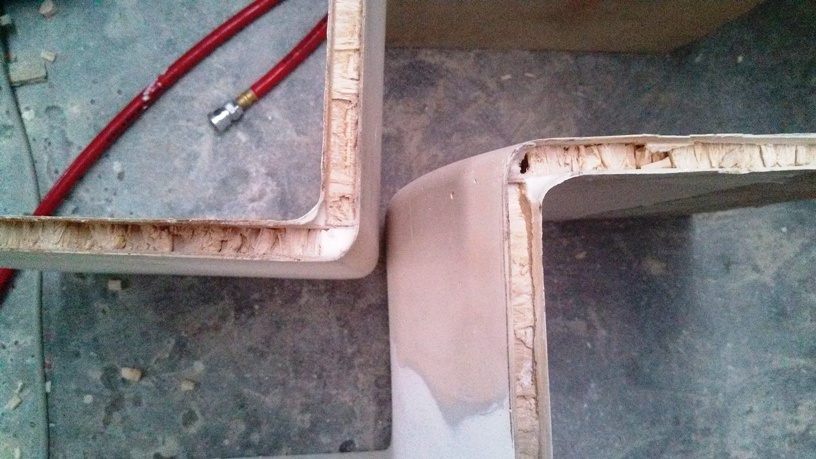
I used a chisel in the most part to remove the balsa from the edges, but along the front curved risers that had been kerfed into shape, glue lines interrupt the balsa edge every 40mm or so and required a little more force on the chisel to break through it, in the from of a hammer. Just a tap is all that is required to break the thin (2mm or so) glue line. Everywhere else the chisel can be pushed with just the palm of each hand. Except for the butt joined, coved and glassed corners. That needed a die grinder and bit to remove. It must be removed because I need the edges to be one, long, continues trench. The edges of both the doors and the steps will have uni rope embed in them under the filler to give the edges strength and structure. In order to break or crack 20mm of solid glass must break. Near impossible without some kind of trauma such as a boat smashing into the back of my steps, but even then, I doubt the impact would break the uni rope.
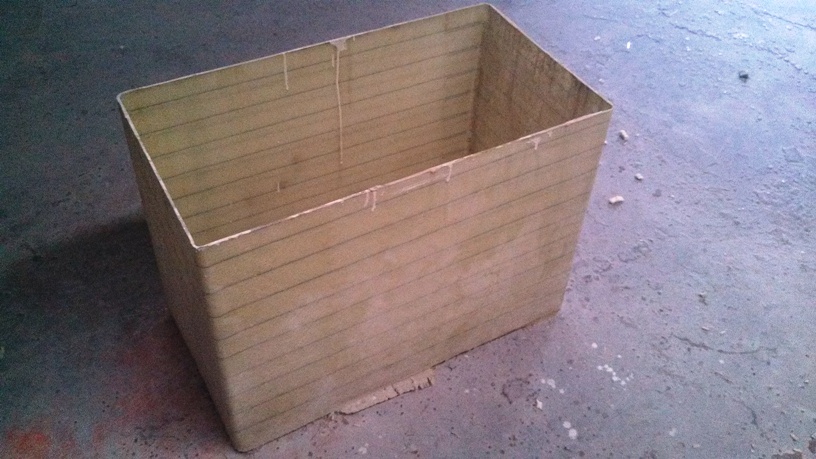
When the outboard wells were made, I had a little help making up the narrowed leg wells that have buoyancy chamber all around to reduce the free surface area of water in the hull and offset the weight of the water I cant avoid by having water tight chambers all around. So we made a mold out of mdf (just a 4 sided box with no ends), curved edges, then covered in tape. Glass was wrapped around it until about 3mm thick. We made one long piece and then cut it to the 2 lengths needed to make the wells. We made way too much, so I have had this left over sitting there looking for a new use. I was going to glass a bottom into it, make a lid, and try to make an esky out of it.
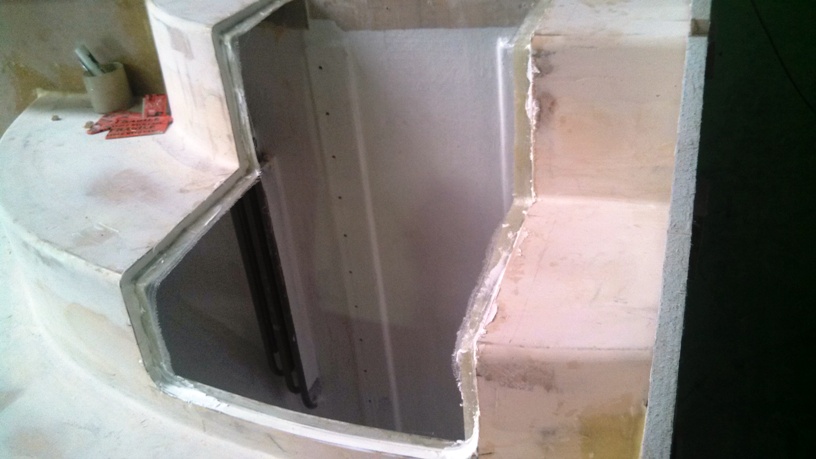
But then I realised I would need strips of glass about 100mm wide with right angle corners both concave and convex under the steps to create the edge frame the steps would sit back into when not being a door. So I cut the rectangle cube into strips, then cut those strips into the right size concave and convex parts to make up a complete “ring” f0r want of a better name, protruding from the edges about 30mm all around and about 70mm under the steps glued then glassed top and bottom.
I then glued each part into the boat butting up to the next piece in the ring until all sides of the opening (except up against the bulkhead along the top, they will have a ply pad glued and glassed to the bulkhead as a support).
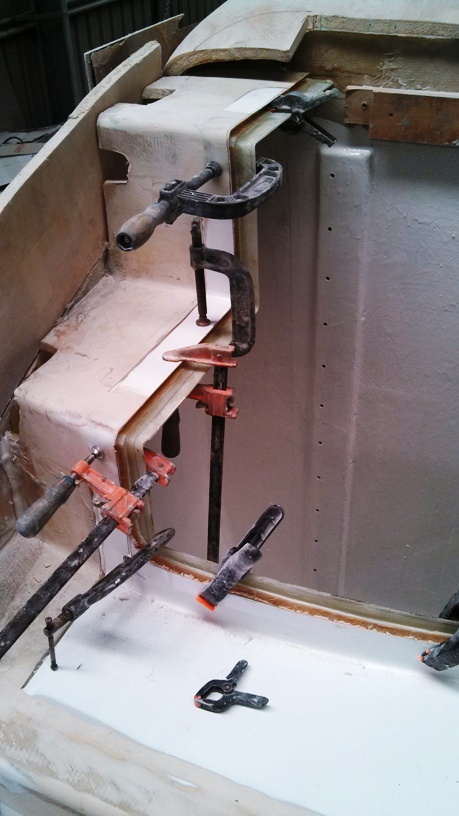
After the glue was set I put the doors back into place to see if I was proud anywhere in my plates. I was. The curved fronts mean that a flat panel attached to the underside must be set back enough so that its edge does not stop the curved front from pushing back into the space deeply enough for the front edges to meet flush. I am about 2mm proud on one edge of one door and fine on the other. 2mm does not sound like much, but it is when one edge meets another. Its like a big step that juts out. But its only 2mm. So the easiest way is to actually add some bog to the front edges (the step tops meet flush so no fairing was needed there) and fairing the edges back to even and then gently back to the curve of the step front. Its much easier than cutting the underside plate back out and re-placing it. In the next pic below you can see where I have added some left over edge filler after filling the door edges, to one of the step fronts that needs building back up to become flush with the door again. Bog and filler are pretty much the same, I add a bit more glue powder to filler than I do to bog, the glue powder makes it stronger but harder to sand, but I am loathe to throw it out and will use it if I have left overs in a pot.
Then I glassed the top of the support “ring” and onto the inside skin of the underside glass (so inside the decored section) before filling the edges with uni rope then filler. The glass on the edge, the uni rope and the filler all wet when applied so set together, so along with the large surface area of the glass strip (30mm x 2 meters all around is still a lot of glass) and of course glassed underneath the the underside of the steps, should ensure that the step opening can hold the step with at least 200 kgs on top secure. The uni rope will set against the glass on the edge which in turn will set against the inside of the underside skin and then the filler would set against both making it into one piece when set. That’s a lot to pull out of that edge to fail, along with breaking through 3mm of solid glass also glued and glassed to the underside the entire opening. That’s a lot to fail.
A tip to keeping the uni rope deep in the edge trough for over filling with filler is use dress making plastic ball head pins to push through the rope and into the balsa below to keep the uni rope deep in the trough. Once you overfill with filler, you will never see the pins again and they cant do any harm in there.
The edges of the doors were also filled with uni rope and filler. When set the filled edges were sanded back to smooth and square and straight. I did the same with the edges of the door openings. I used sandpaper on a cork block to get as sharp a corner as I could to clean up the edges against the plate below. I also ground off the tape overhang and rounded the edges. I then re-fitted the doors. Re-sanding and reshaping was required here and there because the fit was too tight, the combination of too much filler on each edge by just half a millimetre is enough to make the door too tight, a 2mm gap is actually better than a 1mm gap. That way sand or grit wont be wedged tightly into that edge and water will flush it out easily.
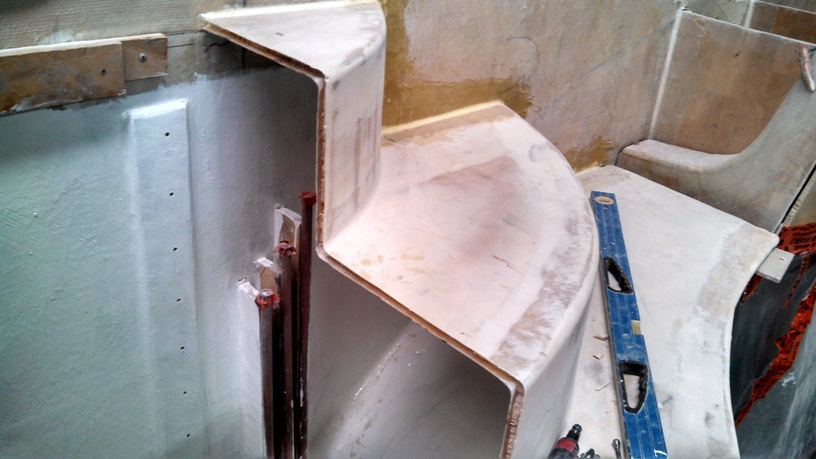
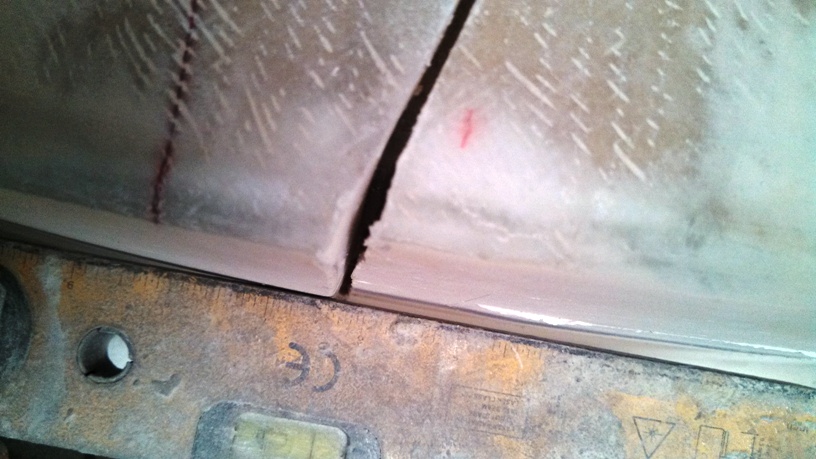
Next I played around with various curves of the hull side profile over the steps. In the end I settled for a simple curve pulled from a natural curved batten. What that means (natural curve) is the curve a stressed batten will make. If you bend just about any material that can bend and then resume its normal straight form, such as plastic, aluminium, wood, fibreglass such as sail battens, etc. and you either secure one end and apply pressure to the other or simply hold each end to the point you want, they will bend to a natural curve. If you apply any pressure anywhere else or in any other direction you can manipulate the curve created. For example secure on end (clamp it) then both bend and push back into the curve with the batten and the curve will move to a more acute curve somewhere along the length of the batten and less so in other parts or more so depending on the forces used and you cam move that curve depending on how you apply the pressure.
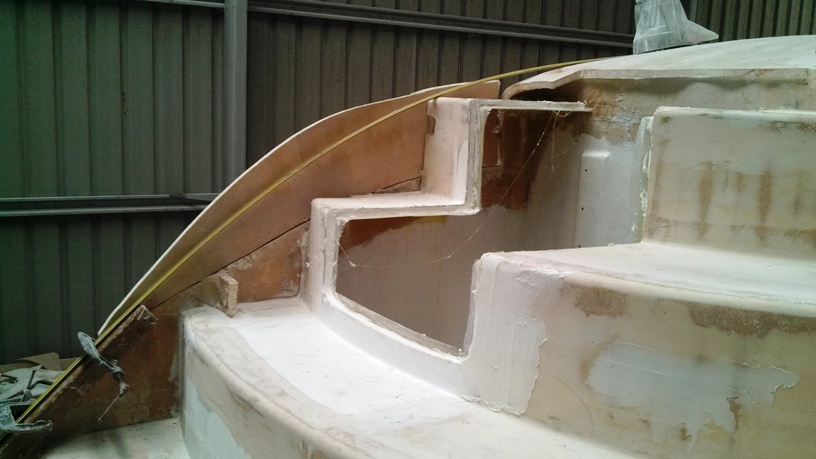
Or if you want a consistent curve then just ensure there is no other point placing pressure on the curve and it should be an exact radius. The bottom 500mm of the steps is flat and will stay so because I have to fit a hand rail to it so flat suits me. (flat section on the stern is how the kit/design came). So the batten is secured to the end of that flat section. You can see in the pic above that the batten is touching the top step. Ideally you dont want the batten to touch anything or the curve will be compromised by that hard point. But it is touching so gently that it does not influence the curve. (I also have to fit a cleat to the curved section but I will have to fit a flat ply pad onto the curved edge to accommodate that).
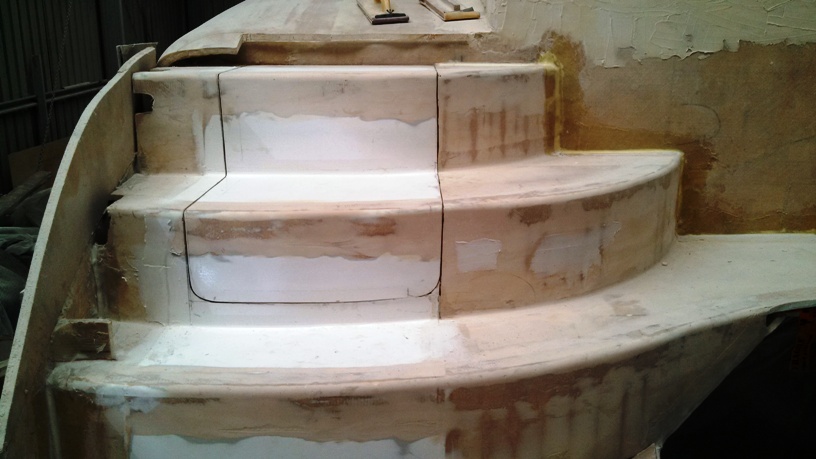
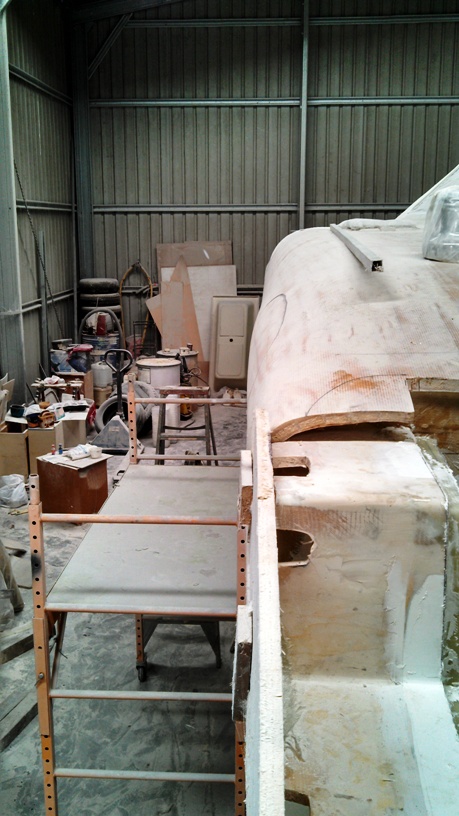
While I was playing around with this curve (I marked it inside the steps and on the outside of the hull to evaluate the profile in context to the rest of the hull) I took a look the “hips” I will need to fair out. I have known for some time that I am/was pretty crap at anything strip planked. Remember the “brows” I needed to fair out of the roof last year. The reason the hips are there is primarily because I deviated from the original plans. I raised the aft bulkhead about 200mm to give me more height under the steps to raise the outboards. This meant I made my own temp bulkheads to create the strip planked shape. Because the issue seems to only be on the section I modified I am fairly sure that the original temporary bulkheads were set at the correct height and only the ones I made with the new height were in some way not fair to each other in order to have the shape I now have. Anyway whatever the cause it is what it is.
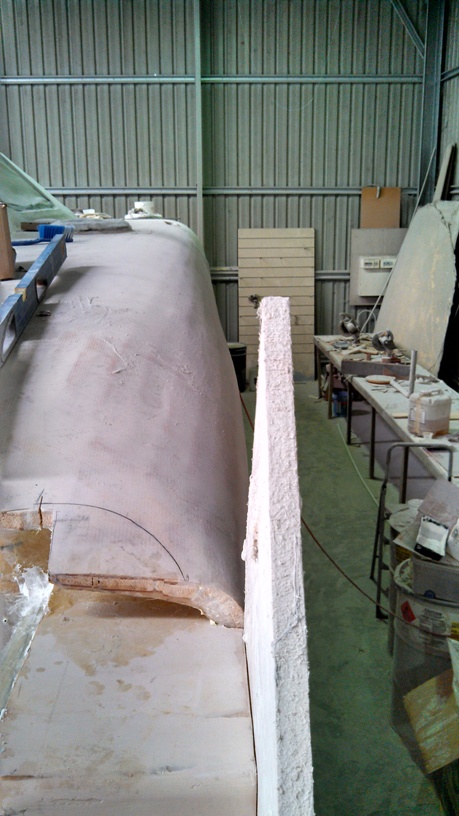
And I have seen these “hips” sitting there for a while, and thought they were much worse than it turns out they are (and bearing in mind that before I fixed the brows on the roof I thought this was all one big snafu). But you never really know how bad a situation is until you put a batten along it to see. And it turns out, even though the pictures seem to indicate that its a lot to fill, it is only about 5mm at the deepest point for about a meter and then progressively less down to nothing either side for about 5 meters overall (between high points) and about 500mm top to bottom around the curved side deck, so about 2.5 square meters of total filled area. After the roof (over 20mm deep over 4 square meters) I eat 5mm fills for breakfast. So when I start the fairing, I am not too concerned with fixing that. (Famous last words I know. I know I should not tempt Murphy, but it really does look way worse in the photos than with a batten across it).
Another solution which I have not yet ruled out is to grind the hips out. Grind down the strip planked section where I have drawn the black marks around, and re-glass that section. That will save bogging up to the high by reducing or removing the high. I have created flat raised sections half way along the hull for the mid hull (spring line) cleats so this will help me fair the hollow that the hips and the cleat plates have created if I choose not to grind the hips out, but then the entire section gets filler, as I said 5mm for about 25% then about 3mm for about 50% then about 1mm for the remaining 25%. That is still a lot of bog, and perhaps the extra work of grinding and re-glassing is worth the savings in bog (weight and cost). The pics do make the problem look big, but that’s the distortion that the closeness of the camera creates. Either way, I think I can fair the hips out.
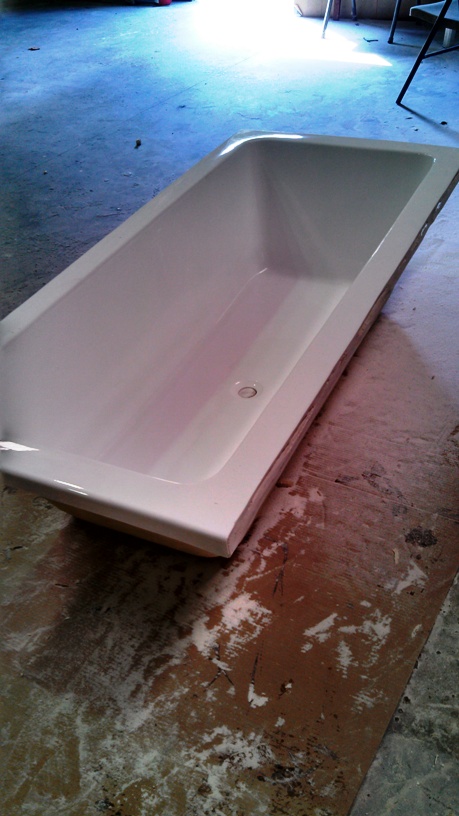
But more on that later. Next to fill out the rest of the day, I skipped ahead to a job I have known about since before I started building and one not many other self builders have had to think about. But a job I have been looking forward to. So I skipped ahead a few weeks to get a start now. For years and years I have planned on fitting a bath to the boat. There are not too many cats with baths in them, certainly not cats under 50ft at least and there are not many places you can fit a full size bath in a cat. A bath may seem like an un-necessary item on a boat, but it will be used for way more things than just a bath, so think of it as a lazarette.
It took me a while to find the right bath shape in the smallest size they make bath’s in. The space I have is 670mm wide at the ends, 760mm wide in the middle (but one edge is flat the other curved) and 1500mm wide and 500mm deep. Most bath’s in this size have arm rests molded into them and I didnt want that, I wanted a simple asymmetric shape that fit the size cavity I had. I found one for only $60. It is a little overbuilt so therefore a bit heavier than I would have liked, but all up it probably weights 20kgs so its not too bad.
The original design of the cat I am building had what is known as a duckboard. A section of bridgedeck overhang behind the final bulkhead. It is used for example to secure the dingy to and is typically about 400mm-500mm deep and spans the entire bridgedeck width between the hulls. We thought this space would not be used by us much but would make a great place to put a bath. Yes, I know the logic doesnt quite follow but Jo wanted a bath, I wanted a place to keep live bait, to store an outboard when not needed on the dingy for long passages, for filling with ice and beer for parties to name just a few reasons in no particular order. And Jo wants to actually take bathes in it so it must be faired and painted like a bath. But I never ever had any intention of making my own bath and fairing it when I could go to my local big hardware store and buy one made from chop strand fibreglass already beautifully white.
The idea of a bath on the duckboard also fitted with my idea of a walk over transom. In effect, with the lid on the bath, we have raised the duckboard to the same height as the seat tops (instead of floor height) and flared the duckboard to give an even larger area at the top. It is 750mm deep at the apex of the curve at the middle and 600mm at the davits. Either side of the bath are smaller hatches for the lpg tanks. So it made sense to us to make better use of the duckboard space.
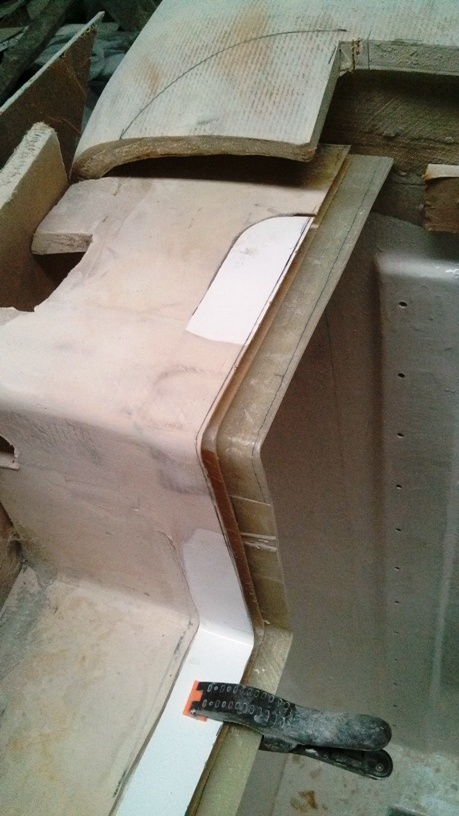
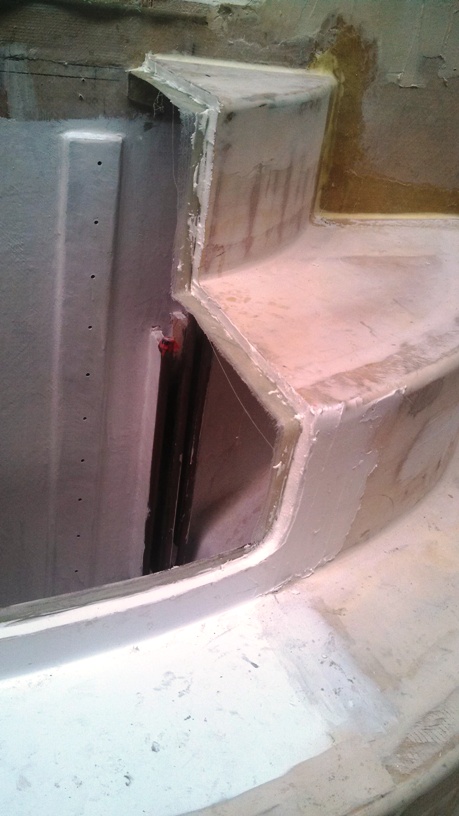
The aft bulkhead is flat of course and the aft panel curved and the sides of the space flat and square to the bulkhead. The bath is rectangle. So I have to shape it to fit into the shape of the cavity it will fill. I marked out its size and cut it with a cutting blade on the 100mm angle grinder. It just fits into the space I have. I wanted to keep as much of the flange all around that I could, for 3 reasons. The flange will become the rest for the lid above which will be stood and walked upon a lot. The lids will be quite large so will need some bracing underneath across the middle to stop it flexing but the flange is wide enough all around to hold the lid up. The next reason is that it is a place for Jo to rest her arms when using the bath, and finally the flange gives rigidity and structure to the bath.
In the pic below I have made the curved flange oversize by 15mm, the thickness of the aft panel as I will probably have the flange sit above and on the top of the panel rather than fit inside the cavity. Its just too close to the corners to cut another 15mm out. If I change my mind I will trim the excess from the flat (bulkhead) side of the bath. Same goes for the ends, they are oversize for the side plates and will protrude into the gas bottle wells. Again this is good, it creates the base for those lids to sit on and gives me an underside surface to glass to to actually glass the bath in each side. Everywhere else it will just be glue holding it down. That and gravity.


So next week I will buy some ply to make the sides of the steps, glass the underside of the step flange, glass the davits in and hopefully glass the bath in. The week after that I hope to finish the last tidy up of closing gaps and fiddley bits to finish off the rear steps by the end of the month.


