
I have spent the last weekend fairing the steps. So far I have applied 3 separate layers of bog and sanded them off again. Each time fixing an area of unfairness or filling holes. The first layer of bog was applied straight over the wet tapes that covered the foam edges and as I did so I also bogged as much of the rest of the steps as I could. It is difficult or perhaps a better description is unnecessary when you can rotate the part, to bog both a vertical and horizontal plane at the same time and not get runs.
Once I had the first bog layer on I sanded it back down to flat as I did get some runs. I use electric help when sanding back the original bog coat. On the curved vertical step risers I use a 1/3 sheet cheapy orbital sander and on the flat step tread I use the Bohler. The Bohler is a dream to use and you get a very fair finish. Still not 100% good enough to completely fair so I will still use a board on it so I often stop using the electric tools with some way to go so that I can finish with the boards with some bog still to go. Whilst the Bohler seems to keep a very fair surface what I found I did when sanding the risers is that due to the width of the risers being only slightly more than the width of the sander the middle was being sanded when I did the outside edge and when I did the inside edge consequently it got twice the sanding either edge got and as I result I had a dip in the middle. This is not so much of a problem considering I still have a number of layers of highbuild to apply and also that the middle will get non slip on the tread so it wont matter if the middle is a few microns lower than the front and back edges but it is better to be exactly fair.


On the curved step fronts (risers) there is no problem in using the 1/3 sheet rectangle orbital sander. If you use a long board on the curves then the most that will be in contact at any point around the curve is a centimetre or 2 so there is no difference between a 1 meter board or a 200mm board or for that mater between a short board, long board or electric sander as it is in effect just a short board. The only thing is you must keep it moving along the curve so in other words use it as you would a static board.
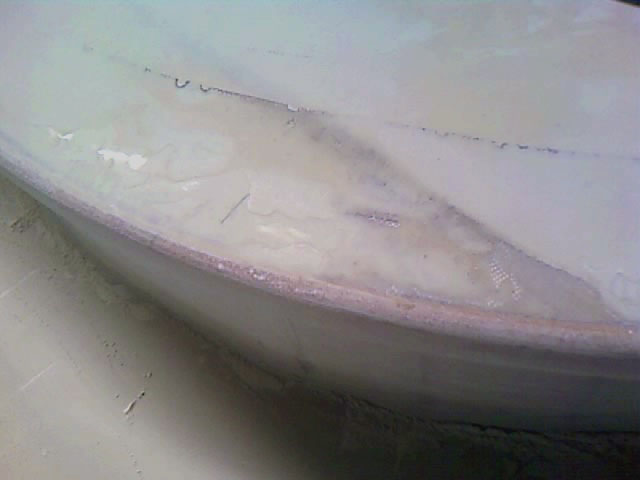
So once I had the rough first layer sanded off I applied another thin layer with a tight screed using a flat edge like a trowel edge so long as you are sure it is pretty flat. This will fill any hollows you created and will result in less work if the application is already pretty fair. The pro builders call this a “tight wipe”. In the pic above you can see the bottom step is faired but the middle step still has the tight wipe layer of bog on it. It already looks fair.
Once this tight wipe is sanded back and glass starts to be revealed you must stop sanding. You don’t want to go through the glass or you have to re-glass it. Not good. Sp if you still have valleys or pits in other areas that contain bog you must back fill them rather than keep sanding down to remove them. So this entails just filling the areas that need to be filled and then fairing these bog touch ups back to the level of the rest of the faired surface.

With the step treads fair it was time to fair the risers. As these are curved the only way to know if they are fair is to run a flexible batten around the curve. By pushing the batten down around the curve at each end of the batten you will see if there are any highs or lows around the curve. I had some lows so I back filled these lows with bog and sanded them off again. Unfortunately I don’t have any pics yet. Then once I sanded that bog off again I recheck the batten and fill again and sand again. Like I did with the tight wipe there is a way to fair the wet bog to help reduce sanding by getting the bog into shape first. This is done by using the batten as a screed. So pile on more bog than needed and screed some of it back off again with the flexible batten.
Then with the risers close to fair (I still had another layer of bog to apply today) I turned my attention to the foam step fronts. Same process as the curved risers but being only 20mm wide it was just a matter of building up the hollows with bog, overfilled rather than shaping the wet bog, and I will just have a bit more sanding work to get the curves of the step fronts perfect curves. I also ran a cove of bog with some coving compound in the mix along the 90 degree edges where each step riser met the tread below. It is important with a curved front that the angle of the coving tool is kept constant or otherwise the size of your cove changes and along a 2 meter stop front with gloss paint on this will be very noticeable.
So far I have spent about 14 hours fairing to do both sets of steps from the moment I started the first layer of bog. I probably still have 12 hours to go too. After I get the risers and front edge curves fair and any minor blemishes back filled it will be time to start high building and sanding that back. Probably a few coats of this. I like to highbuild then sand, highbuild then sand rather than apply a number of coats in one application. Then once I have them close to ready to paint I will cut one of the outboard well lids as I want to take a finished lid with the LED rope lights in to Sanctuary cove to show what can be done with the lights. Ideally I would not fully remove the lid, I would cut most of it out but leave tabs in so that the entire steps can be fitted to the boat as one piece. Otherwise any slight twist in the fit and the lid wont fit fair again. But because I want to take the lid with me I will cut it out then re attach it in some way before fitting the step set in. So once cut out the entire edges need to be de-cored and back filled on both parts to completely seal the balsa core in. This is critical. It will be a high tread wear area and core integrity will be critical.


