
Another stinking hot weekend, yesterday was not as hot but today was low 30’s and extremely humid, until the late afternoon summer storms hit. I rode the scooter in a t-shirt and shorts to the shed so I headed off to beat the rain at 5.00pm but it poured down as I got half way home. I enjoyed getting wet but I don’t like riding the bike on wet roads.
It was hard to get much work done today as the heat in the shed is intense and slows down progress, jobs take twice as long in the heat, which is ironic because pot life of resin based products is halved! It means you mix smaller quantities more often, which takes longer.
I had business in Melbourne on Thursday and I usually fly down and hire a car and fly back but I bought this windsurfer mast, boom and sail on eBay and it was in Melbourne so I drove down on Thursday, leaving early enough to arrive in time for a 3 pm meeting, went and picked up the mast etc, then drove home on Friday in time to pick Jo up at the airport on her way home from Brisbane where she had gone for the 2 days I was away to attend middle school graduation for Jacob and accompany him back to our place for the holidays. We arrived home at 1 am and after driving for the last 2 days I was exhausted, so we slept in on Saturday morning, and I didn’t get to the shed until lunch time.
Yesterday I spent most of the day working on the dingy and just pottering around trying to work out what and how I would mount the mast, how to mount the rudder and experimenting with sheeting points to figure out the best method so that the sheet and the rudder tiller don’t impede movement from the windward to leeward hull when tacking. The method I chose for mounting the mast was to glass a plastic tube against the forward bulkhead and then sliding a metal pipe inside that (and removing at when not using the mast) and the mast would slide down onto the metal pipe. I was originally going to glass an oversize tube in that the mast would slide down into but the sail extends all the way to the bottom of the mast so if I used that method the bottom of the sail would bunch up and change the shape of the sail.

Today, despite the heat I finally got back some of the motivation that has been lacking for the last couple of weeks. I ran some strips off to get started on the inside bow planking and I glued back on the piece that I cut off the chamfer panel when I was making the hulls. If you remember, the chamfer panel was just too hard to torture and cajole into place so to make the job easier (with Brett on the first hull and using the off cut as a template on the second) we cut a piece off the chamfer panel. Today I finally glued it back on at the other side of the panel to return it to its original shape. The panel is now square to level instead of sloping down and it now meets the shapes of the bulkheads where they change from straight edge to curves for the planking.


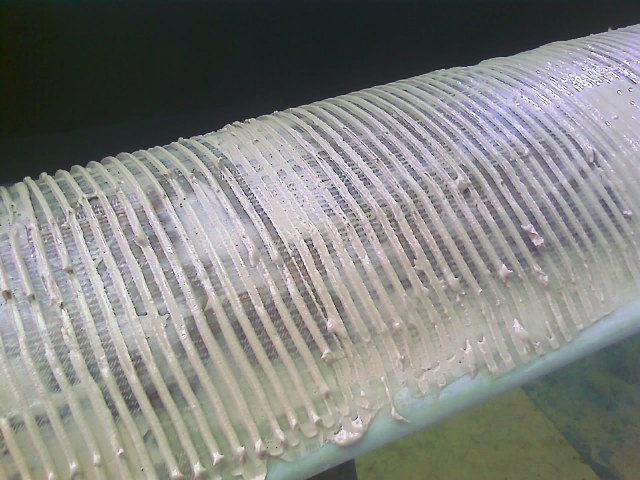
While the glue was setting on the part added back I started on the forebeam bogging. In order to save sanding or at least make the sanding easier, there is method of bogging where you apply much less bog initially but using a serrated trowel, then you only have to sand the bog strips down to fair, then when fair you back fill to the height of the faired bog. I mixed the first batch of bog too thick and as a result when I started applying it with the serrated trowel it would lift or break in parts leaving a very uneven and blotchy finish. I compensated too far and mixed the second batch too runny, this is worse because the raised bog lines just melt into a flat finish again. I also discovered that the best way to apply the bog in even strips is not to apply the bog first up with the serrated side of the trowel but to apply it in the normal way, all over, then to run the serrated trowel through the laid bog to leave the bog strips.


Once the bog was on I went back to the strip planking and planked the first 2 planks. The first 2 planks on any strip planked section is always the top and bottom planks. These have to butt up to the panels they will be eventually glued to and form the outside extremes of the panel. Form there you basically plank to fill the gap, each plank making that gap smaller until eventually you have a completed panel. Some people also recommend that the next plank should run down the middle and then you plank out (above and below) to the edges from there. I am not sure why this is important. I did this on the hull to deck panels and it seems to work so I will repeat it on this panel.

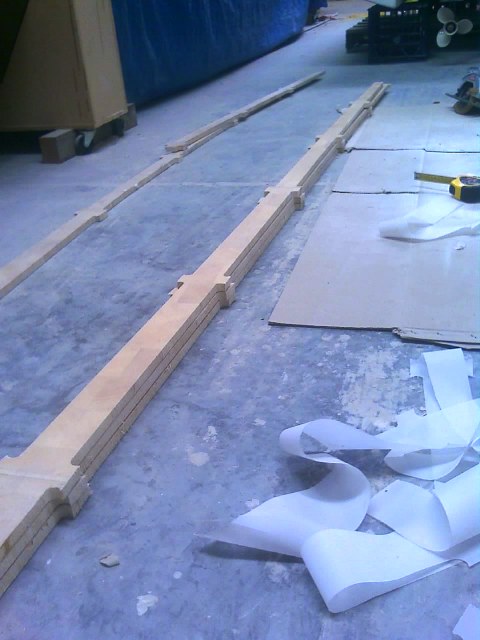
I also glued some offcuts together today to make the keelsons. These are made from strips of duflex glued side by side and then glued and glassed into the hull at the keel in order to strengthen the sections that don’t have webs and soles. Unfortunately these are the 2 sections between bulkheads 1 & 2 and 2 & 3, which are narrow buoyancy chambers and I will need to climb down into them in order to glue them into the boat.
Despite the heat I was enjoying making progress again and planking is a really fun part of the build and part of the fun is that the work is noticeable, that is, the planked sections change the appearance of the boat and the work is very tangible. Having said that, it was at this time that the first lightning and thunder started, so I decided it was probably wiser to get home before the rain set in as I was on the scooter (even then I left it a little late and still got wet), so I packed it in for the day. It has been a short while but I cant wait for tomorrow again, so I can finish the planking on this panel.


