The davits, which I made a few years ago are finally glued and glassed into the boat. And the boat has its long awaited bath. Its glued in and glassed where it can be (under the overhang against the walls of the gas tank wells). The outboard hatches doors are fitted and a little of the fairing of each step riser, where it protrudes proud due to the underside plates, has been done. In short, I got a bit done the past week or so.
The climate is still not helping, 80% humidity at 30 + degrees each day make it tough going, the sweat just drips off me often from my brow and into my eyes usually whilst I have resin coated gloves on. And this summer just does not want to end. It is by far the most consistently hot it has been in the 10 summers I have been building. Its amazing to me that there are still people who dont believe (even some media commentators but perhaps most gallingly, some in our government) that the climate is warming at all let alone that human activity is the catalyst of it. One of my motivations in pushing on with this decade long build is to get out to the Great Barrier Reef before we kill the other half of it. (Over the past 30 years half the corals on the reef have died mostly as a result of the fertilizer run off from the intensive sugar farming that occurs along a lot of the tropical coastal lands leading to explosions in the population of coral destroying crown of thorns starfish, once humans start messing with the balance nature shows us what cause and effect really means, and we mostly ignore it).
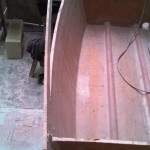
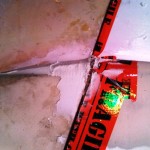
The bath got its first dry fit and I immediately saw just how dumb I can be at times. As detailed at the end of the last post, the well into which the bath goes is almost rectangular with 2 flat sides and one flat edge along one of the long edges against the aft bulkhead but curved along the other edge (the most aft). I cut the bath to suit the space, it of course was originally rectangular. The curved aft panel fooled my eyes into misplacing what I thought was the centre of the space where the drain hole would fall. I have 2 conduits glassed into the floor of the duckboard, they have 2 purposes, first one was housing an aluminium tube that was going to be a solid tie rod, but for a couple of reasons I wont be using that method, first the risk of dirt or sand getting in and the rod jamming in the tube was to great and hydraulic steering means the physical tie rod is replaced by a hydraulic hose. The other conduit was for the outboard controls and wiring. The other purpose of the conduits is to act as stiffeners for the duckboard so as to support 250kgs of a bath filled with water. Take a look at the pic above left and its easy to see how the eye is fooled, the red conduit is where I wish I had placed the one glassed in next to it. I could also argue that I glassed the conduits in long before I found the bath I want, but all bath’s drain somewhere along the centreline so that excuse dont fly.
One thing that surprised me, when I was trimming panels for the exact height I needed beneath the bath lip so the base would sit on its mounts (yet to be added to the pic below but I glued ply pads to the tops of the conduits to meet up with ply pads built into the bath base) is that as I was trimming the curved panel it sprung back to straight again. The boat was holding it in its curved position and when the saw released a piece it immediately resumed its original state. After all these years I thought perhaps it would retain the curve now. Not.
I thought I had placed the conduits so that they would sit about 1/3 of the width of the bath on each side breaking the space each side of them into 3 roughly equal spaces. But the curved back of the space fooled my eye. When I dry fitted the bath guess where the rear conduit lay? Yep directly below the drain hole. I could not have got it better centred had I been trying to. So unfortunately the conduit has to be cut out. I still want the conduit to act as spanning support so I will want to beef it back up somehow, and I would still like to use the conduit to thread wiring through somehow, but this is not critical, because I have installed another bigger one along the base of the bulkhead to accommodate the hydraulic lines that will tie the 2 rudders to the steering wheel (helm pump). I will be having reinforced rubber flexible hydraulic hoses made instead of the usual semi rigid plastic pipes. These rubber hoses are a big bigger outside diameter than the tubing so I thought a bigger conduit would help, turns out it may now be essential (you can never have too many conduits).
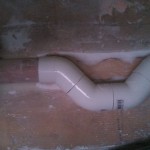
I decided to try to fix the problems (both of them, rigidness and use of the conduit as a conduit) by glassing in a bypass of the conduit using 4 part turn pieces, and some stiffeners either side to add back the rigidity that the now broken uni-covered conduit did have. Once I glassed the conduit s bends in I glassed ply pads either side (unfortunately I forgot to take a pic of the ply pads) which acted as both an added stiffening connecting the now 2 sides of the conduit back into a single stiffening beam I recreated the tunnel connection between the 2 sides. I can no longer send cables through easily by just pushing them from one side to the other buy maybe I can send a mouse line through by sucking string from one side to the other with a vacuum cleaner and then pull through some cables with it. If I cant I still have the extra conduit I glassed in at the last minute to take up the slack. Call it a rookie mistake. First time I have ever glassed a bath into a boat.
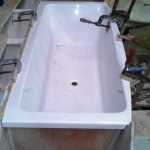
The good news is the bath is finally glued into the boat. It took a while longer than expected, not just because of the conduit. Angles mess with my head a bit. The angled sides of the bath are at a different angle to the curved back. Terry helped me dry fit and we could not understand for a while why the bath would not drop down all the way into the cavity. It was only a few millimetres but enough to stop the lid when fit from being flush to the bulkhead. We trimmed where we thought it was binding but each time we replaced it, it would still stop too high. Until we finally realised the side along the curved edge was rubbing against the bath and preventing it from dropping in. I ground back the chop strand on the bath where the rub marks were and almost went too deep but managed by luck to stop in time not to break through. But it solved the problem of the fitting and in it dropped onto the ring of timber I had glued in to seat the lip down onto. Just to be safe I glassed a couple of layers of glass back onto the bath to reinforce the chop strand I ground away, even though it would be bedded up against the curved boat back. But it is finally in. And with it in, I could finally place the last piece of duflex I have been saving as its lid on for marking to be trimmed to size and give me a glimpse of the size of the space the seat lids make up. I envisaged that I would have to stiffen the underside of the lid to walk on it, figuring it would flex too much being so large but it is surprisingly solid underfoot.
I dont have duflex left to make lids for the 2 wells either side of the bath (lpg storage, main and spare). I also have to make some half steps over the bottom of the davits to make the step up to the seat top level into 2 steps of 250mm each, 500mm is too far to have to step up in one step. I will need to use ply for these parts. Hopefully as offcuts from the rear step sides still to be made.
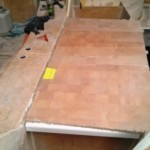
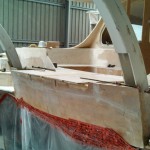
In the meantime I have faired out the unevenness of the outboard bay lids/step fronts, or at least I have bogged them to the same height ready for sanding. I masked the doors as they are the high parts and bogged the step fronts to them. The last pic looking from above shows the 2 faces of the door and the step front now meeting flush again. The step tops meet fairly, it is only the fronts on one side on each door (and along under the bottom of the door where it too meets the step front – see the middle pic).
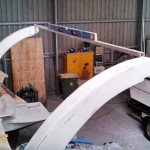
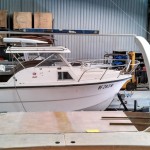
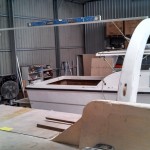
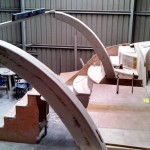
And then finally, the davits. I built the davits a few years ago, then did a little on them here and there. It seems a lot of things in the boat were built a few years before they finally get fitted. (anyone reading remember when I made the daggerboards! has to be nearly 7 years ago). I decided long ago that perhaps the steps should go in before the davits. I dont know why, but it seemed like a plan. The steps are in now, so the davits needed to go in next. And so it came to be. I finally dry fit then glued the davits in (and glassed them in places but the main set of glass is yet to go on, it is going to take a lot of glass for it to be stronger than the lever action at the ends of the davits, mostly uni but a lot of glass!).
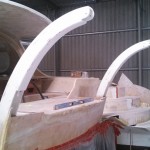
Again Terry helped me with the dry fit. Even though I measured every possible way and to the 2 davits within 10mm maximum difference of each other on every possible measure and got them perfectly level one of them still looks like it is leaning in slightly and nothing I can do can make it not look like it is. To Terry. To me they look fine. And Terry agrees, the difference is not worth worrying about or even trying any more than we have to correct it. I am not going to tell you which one. I have taken photos from every angle for you to choose for yourself.
One other strange thing, I had the davits clamped in place for the dry fit and when I had them in the best position they could be according to measurements (10mm discrepancy), levels and Terry’s eye I marked them for refit in a number of places so that once I removed them for gluing I could find where to place them back. Once I glued them and put them back exactly to the marks on each one they no longer matched and I had to adjust them until they did, level, and by measure, by this stage Terry’s eye was otherwise employed on his own build, and the marks no longer met but the measures were even closer, within only 5mm. Weird.
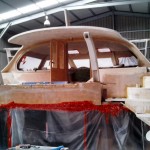
Dry fit above, glued below. Pretty happy about the level just saying.
The plastic sheet hanging under the bridgedeck is to keep dust out, I have a storage area under there, it is the only place in the shed I can guarantee wont get dust on it at the moment.
So next week I plan on buying some ply, probably 12mm, to make the stern step sides. Big job, probably take me a couple of weeks. Then I have a few gaps in the steps to fill each side and make the final half step up to the seat top level and to shape and hinge the lids.
Pretty happy with the progress of the last few weeks. Wont be long now before the hull fairing can start. Yoo hoo, looking forward to that. Kinda. (But only if the weather finally cools down a bit).











Karel Michielsen
Paul, just looking at your photo’s it looks like you intend to solidly “glaze” your BH windows. Whilst building Alcatraz I came up with the idea to make them removable and have found this the be invaluable as, it allows the helmsman to look forward thru the cabin, much better ventilation and it opens up the space making the cockpit / saloon one. In normal weather we never close the openings whilst cruising.
Karel
Have you seen https://www.youtube.com/watch?v=Bou2zCDaZe0
webmaster
Hi Karel, I am still working on a solution for the main bulkhead windows. I was planning on openable windows and had not considered removable but will give it some thought.
Nice video, is your starboard daggerboard removed or does it just bury below deck level when deployed?
Karel Michielsen
It sinks to about 800 below deck in the fully deployed position