
I virtually had a day off work (job) today and whilst I was building a boat it wasn’t MM. A friend and I are making 2 dinghies out of scrap duflex. But first a little background. One of the great things about building a catamaran is the camaraderie among builders and ex builders. One such ex builder is a guy I met here at Gosford. Warren has built a 40ft strip planked Crowther cat and I saw his cat tied up at the marina at Gosford so I introduced myself and told him what I was building. We instantly struck a friendship and Warren invited me on board to see his boat and has visited my shed to see my progress.
We had a plan to make Warren another daggerboard at my shed after he had one stolen (off his ute) and in the process show me how they are made and get me started on mine but that plan was shelved in favor of another project. The waters around here abound with oysters and they grow on any jetty pylon. The problem with this is it punctures inflatable ribs easily. Warren has a rib that has more patches than original rubber surface and is finally sick of repairing it. We have decided to build 2 dinghies based on the shape of a rib. Rib’s great feature is their stability. When someone gets into one it doesn’t tip at that point and become an unstable platform. like a V bottom boat would and doesn’t have the drag through the water that a flat bottom boat would have. Like most cats it should have stability and be easily pushed through the water. That should mean good speed with a small outboard and made out of duflex it will be strong and almost indestructible and fairly light. Besides how could we have a cat and a mono! One of the great things about this plan is that I get to practice techniques that will come into play in the building of the MM. The other great part of this plan is we are making them out of offcut duflex.
Warren drew the plans (well you couldn’t really call them plans, more sketches on the back of napkins!) and took the design fromThunder Cats, a rigid inflatable type boat raced in the surf. There were a couple of important measurements such as the angle of the keel of each hull to ensure the boat easily planes and the curves of the hull in and up to form the pointed bows and the length and beam overall but otherwise it was a lot of what looked right by eye so far.
We started by scrounging all the offcuts we could use to make the various boat panels. We needed to glue some panels together here and there but we have managed to find enough offcuts to make 2 dinghies with a length of about 3.5 meters and about a 2 meter beam. The first panels we made were the inside panel in each hull and we had to make 4 identical panels. These are the longest panel on the boat. We then cut 4 mdf temporary bulkheads and 2 duflex bulkheads and attached them to the first hull panels. The bulkheads were made to the exact size and shape we wanted the hulls to be.


We had to join 2 pieces together for the inside hull panels on the second boat. We will let them set overnight and join the bulkheads to these panels in the morning. One of the panels we made needed us to make our own z joinswhich we did with a router (the other offcuts had the factory z joints in place).
Next we started making the keel panels. We knew the width at the stern to about mid boat that we wanted it to be at the stern based on the size of that face on the bulkheads but the shape of the panel as it narrowed into a point we made up as we went along and was decided by eye to an extent.
We attached the keel panel to the bulkheads and then marked the panel for scoring. The scoring is a method used to curve the flat panel over a short distance. A place where this occurs on the main build is on the bridgedeck at the front where it curves up to the deck. You run a circular saw (or router) through the inside glass and the balsa. The tighter the curve the closer the spacing (and frequency) of the scores. There is no formula for the spacing as far as I know, you just learn it by trial and error so what better place to trail it. Once you have appropriately scored the panel and achieve the curve you want you fill the scores with runny glue and set the curve to the panel and let the glue dry. When it is dry the panel will hold the curve and you can glass it to seal the panel and return the strength to the panel.


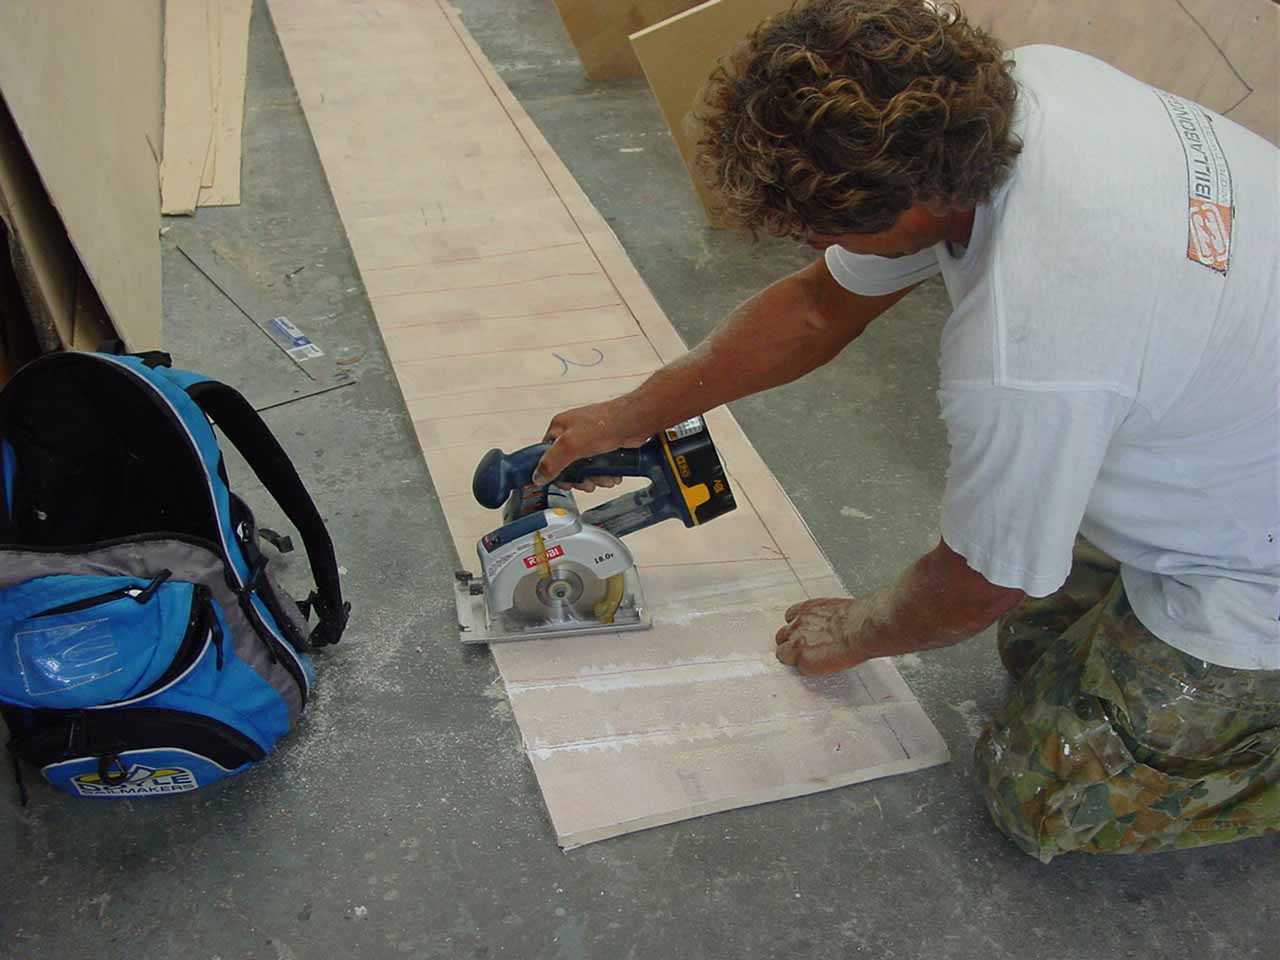
Once we had scored the panel and attached it to the pre shaped bow of the inside hull panel we had an idea of the shape that the final outside hull panel should take and also the shape that we needed to cut the keel panel to at the bow to create the sharply pointed bow shape we were after. We marked the panel with a line then carefully took the scored panel to the bench to cut. In order to move panels that have been scored you really need to clamp a rigid panel onto the scored section so that it cant break. We cut the panel to shape and then used it as a template for the other 3 matching panels for the rest of this boat and the other boat.


The middle picture above shows the starboard hull curved to show the upward curve of the keel but before we shape the inward curve of the hull. The right hand pic gives an idea of the overall shape of the dingy based on the beam set and the shape of the bulkheads. This may be a little too wide we will set that tomorrow when we make the transom bulkhead and the forward bulkhead. We have glued the curve of the starboard hull and will glass it tomorrow. We will also start making the other 3 hulls (the port hull of this and the 2 hulls of the second boat).
I will not add the time spent on this side project to my build hours as it is not related, but so far we have each spent 6 hours. So 12 man hours but we will be making 2 boats. So far this little project has gone very well and should result in a fun little dingy each for Warren and I.
Once all the hull panels are cut and glued together (the top of each hull last) we will cove and tape (glass) them and then set the 2 through bulkheads and also tape them before finally setting the deck. We can cut some hatches into the hulls, I am a fan of having the outboard gas tank inside a lockable hatch so it cant easily be stolen. We also have to set the transom height and add bollards and other attachments before fairing the hulls ready for a final finish. We will give the hulls and underside of bridgedeck a couple of coats of resin to fully seal it but I am not sure yet what we will do about painting them. We hope that this project only takes us a week or 2 before at least the first boat is on the water.


