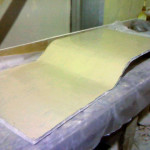
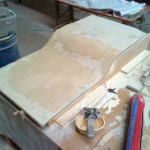
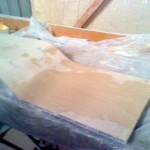
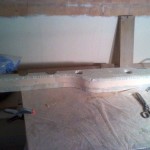
With the shape of the cupboards decided on I made an mdf mold from the cardboard template. 4 mdf panels cut to shape make up the mold and because both sides are identical but mirror image, the one mold will make both sides. Thats the beauty of non glassed polycore. Cold molding and glassing. And just because I am a glutton for punishment, both sides will not only be curved but be at different heights, not just to each other but 2 different heights within each side, so 4 different heights. More on that as they construction and shape reveals itself, but long story short, the toilet is going to be set at 400mm off the floor (as most toilets are) and the vanity cupboard needs to be 850mm high at the vanity basin end but only 600mm high at the other end because this is where the escape hatch will be housed. So I am starting with 2 panels 600mm high each, then one will be added to, and one will be cut down. The one that is cut down will have 2 x 100mm kickboards cut from it, pre-curved to suit each side.
Once the panels come off the mold they need to be bogged for fairing. Whilst making curved panels is not difficult, making fair curved panels straight off a mold like this is. I could make proper molds but for 2 pieces thats hours and hours of work and just not worth it. Its easier to bog and fair. Once both sides are glassed and set the panel will hold its shape but to get the closest to fair you do need to pull the panel tightly into the mold and to do this you need to screw it down, which means you cant bog until you remove the screws unless you are OK with pulling the screws through the panel and because I dont yet know which one will be for which side, so in other words which will be the face and which the inside, I cant do that. So I let the glass go off enough that the panel held its shape but not enough that it was not still green enough to get a chemical bond to the bog, then removed the screws and decided which side of each panel needed the least bog to get fair. (less bog means less weight). Then once the bog set, and in winter we are talking a few days, I started fairing them. As with any fairing, it is unlikely you will get a fair surface from one bog wipe. Thats because I favor the method of applying a thin bog layer then sanding it down then applying another bog layer in what is called a tight wipe second and sometimes third wipe. It takes a little longer because of the wait between the bog wipes setting but it is much less work because you are not sanding off as much bog to get the fair surface and you end up with a much thinner bog layer, in fact in places you should have no bog at all.
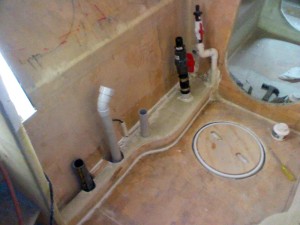
Once fair, the best panel was chosen as the bathroom vanity and the other as the toilet cabinet. During fairing I used a straight edge across the panel (90 degrees to the length) to ensure it was flat. Of course it curves along its length but you want it flat up and down. What tends to happen when you bend such a panel is that it turns up at the edges. I know this going in and intended that I would fill the middle to meet the egdes and one of them would have 100mm cut off each edge to become the kickboards for each side which further reduce the curling and therefore the need for bog. So I faired them knowing that one panel was to have the kickboards cut off and didnt worry too much about the extra height on its edges. Anyway, having decided which panel was which I cut the kickboards and made a bottom shelf from flat glassed polycore to complete the kickboards. In order to dry fit them though, I needed to cut out all of the holes for all the various pipes through each. Besides all the of the pipes through there is a conduit for the transducer cable and power for the sump pump through the floor into the sump, and up high enough so that it emerges above the water line, so that should that sump ever flood, it wont overflow through the power conduit. I will seal the top with silicone just to be safe but it should not be necessary. There is also a conduit made from 40mm fuel hose, for feeding the water and power to the toilet. It is gently curved and smooth inside, so power and water can be fitted or removed at anytime for maintenance (The black hose visible in the pics) It travels under the bathroom floor but not through the sump. Once that was all done I could dry fit it and get a real feel for how it would all look. Of course my impatience got the better of me so I was dry fitting before the final fairing.
I even cut cardboard shapes to show where the toilet would protrude into the walk space. The toilet needs to be set on an angle so as to maintain sufficient space to get passed it. This contributed to the idea of the curves to help facilitate this space compromise. Once I was satisfied with the dry fit I glassed the kickboard on the vanity side in. This included glassing all of the pipes up through it in to seal them. This provides a second layer of seal as they are all also sealed through the sole. This seal is more so any spills or leaks inside the vanity cabinet dont leak into the space under the kickboard.

